
cPanel is a powerful web hosting control panel that allows website administrators to manage various aspects of their websites, including files, databases, domains, and more. Occasionally, users may encounter issues with the cPanel File Manager, preventing them from accessing or uploading files. In this guide, we will walk you through the process of restoring the cPanel File Manager and uploading default files to your websites.
Step 1: Diagnose the Issue

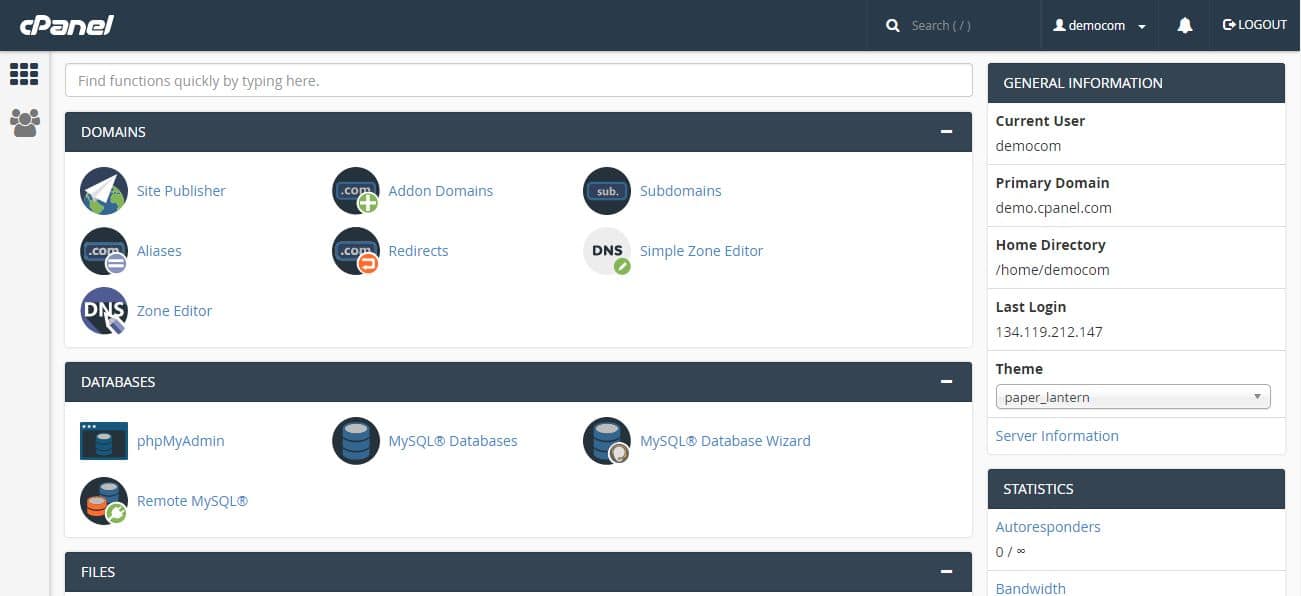
- Log in to your cPanel account using your credentials.
- Navigate to the “Files” section and click on “File Manager.”
If you encounter an error or are unable to access the File Manager, take note of any error messages displayed.
Step 2: Contact Your Hosting Provider
If you encounter issues accessing the File Manager, it’s advisable to reach out to your hosting provider’s support team.
Provide them with details of the issue, including any error messages, to help them identify the root cause of the problem.
Step 3: Restoring cPanel File Manager
Once your hosting provider has resolved the issue or provided guidance, log in to your cPanel account.
- Navigate to the “Files” section and click on “File Manager.”
- Check if you can access the File Manager without any errors. If the issue persists, follow any instructions provided by your hosting provider.
- Open your Public HTML file, select all files and delete all files.
Step 4: Upload Default Files
If you need to upload default files to your website, first, ensure you have a backup of your existing files, as uploading new files may overwrite existing ones.
In the cPanel File Manager, navigate to the directory where you want to upload the default files. This could be the root directory (public_html) or a specific subdirectory.
[ Click Here and Download the Default Files ]
Click on the “Upload” button in the top menu.
Step 5: Uploading Files via File Manager
A new window will appear, allowing you to select files from your local computer. Browse and select the default files you want to upload.
Click the “Open” button to initiate the upload. You’ll see a progress bar indicating the upload status.
Once the upload is complete, the default files will be available in the designated directory on your web server.
Step 6: Verifying Uploaded Files
After uploading the default files, you should verify their presence in the File Manager. Navigate to the appropriate directory and confirm that the files are listed.
Test your website to ensure that the default files are functioning as intended.
Conclusion:
Restoring the cPanel File Manager and uploading default files are crucial steps in maintaining the functionality of your website. Byfollowing this comprehensive guide,you can overcome issueswith the File Manager and ensure that your website’s core files are properly uploaded and accessible. Remember to always work carefully and keep backups of your files to preventany unintended data loss during the process. If you encounter any difficulties, don’t hesitate to seek assistanc from yourhosting provider support team.
Top FAQs Answered:
cPanel, an industry-leading web hosting control panel, empowers website administrators to manage various aspects of their websites seamlessly. Occasionally, users may encounter challenges while accessing or uploading files through the cPanel File Manager. This article serves as an extensive guide to address the most frequently asked questions (FAQs) related to restoring the cPanel File Manager and uploading default files. Let’s delve into the details.
FAQ 1: I’m unable to access the cPanel File Manager. What should I do?
If you’re encountering difficulties accessing the cPanel File Manager, follow these steps:
- Clear Browser Cache: Sometimes, browser cache can cause issues. Clear your browser’s cache, cookies, and temporary files, and then attempt to access the File Manager again.
- Try a Different Browser: Switch to an alternate browser to check if the issue persists. This helps determine if the problem is browser-specific.
- Check Network Connection: Ensure your internet connection is stable. Sometimes, connectivity problems can affect access to web-based tools like cPanel.
FAQ 2: How do I contact my hosting provider for assistance?
To get help from your hosting provider:
- Locate Contact Information: Log in to your hosting account and find the support or contact information. It’s usually available in your cPanel dashboard.
- Provide Details: Explain the issue you’re facing, including any error messages. The more details you provide, the better the support team can assist you.
FAQ 3: What steps can I take to restore the cPanel File Manager?
If your File Manager isn’t working, consider these steps:
- Check for Server Issues: Sometimes, server-related problems can impact the File Manager. Contact your hosting provider’s support to identify and resolve server-related issues.
- Update cPanel: Make sure you’re using the latest version of cPanel. Outdated software can lead to compatibility issues.
FAQ 4: How do I upload default files using the cPanel File Manager?
To upload default files, follow these steps:
- Backup Existing Files: Before uploading default files, create a backup of your existing files to avoid accidental data loss.
- Access File Manager: Log in to your cPanel account and navigate to “Files” > “File Manager.”
- Choose Directory: Navigate to the directory where you want to upload the default files (e.g., public_html for your main website).
- Upload Files: Click the “Upload” button, select the default files from your local computer, and confirm the upload. A progress bar will indicate the upload status.
- Verify Upload: After the upload is complete, check the directory to confirm that the default files are listed.
FAQ 5: What if the uploaded default files aren’t working?
If the uploaded default files aren’t functioning as expected:
- Check File Permissions: Ensure the file permissions are correctly set. Incorrect permissions can prevent files from functioning.
- File Structure: Double-check that the files are in the correct directory and maintain the required file structure.
- File Compatibility: Confirm that the uploaded default files are compatible with your website’s framework or CMS.
Conclusion:
Restoring the cPanel File Manager and uploading default files are critical tasks in maintaining your website’s functionality. By following the steps outlined in this comprehensive guide, you can overcome common challenges and ensure that your website remains operational and secure. In case of any uncertainties, please don’t hesitate to seek assistance from your hosting provider’s support team. Remember to exercise caution and maintain backups to prevent unintended data loss during the process. Your website’s success and functionalityare within your grasp, even when encountering technical hurdles.
Read Also: